Getting Started with ESP32 Wi-Fi
## Introduction The **ESP32** is a powerful microcontroller with built-in Wi-Fi, making it ideal for IoT, smart devices, and wireless communication. Two of its most essential Wi-Fi operating modes are: - **Station Mode (STA)** - **Access Point Mode (AP)** ## What is Station Mode? In **Station Mode**
#Introduction
The ESP32 is a powerful microcontroller with built-in Wi-Fi, making it ideal for IoT, smart devices, and wireless communication. Two of its most essential Wi-Fi operating modes are:
- Station Mode (STA)
- Access Point Mode (AP)
#What is Station Mode?
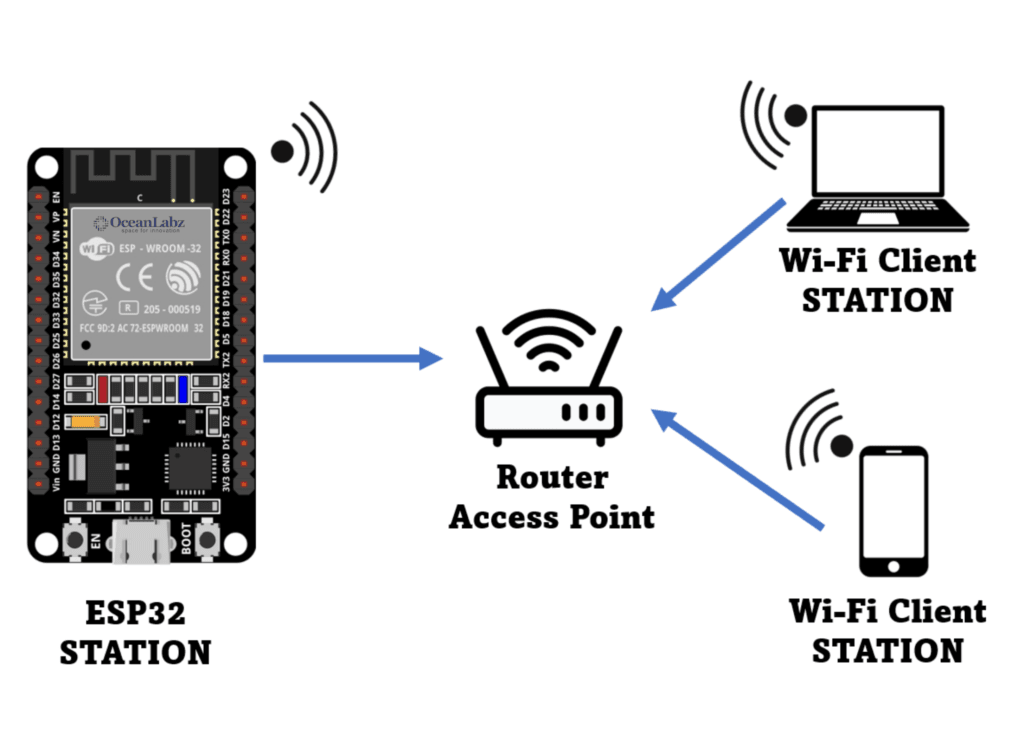
In Station Mode, the ESP32 acts like a Wi-Fi client—it connects to an existing Wi-Fi network, such as your home router or a mobile hotspot. Once connected, the ESP32 can send and receive data through the internet or a local network.
#Example Use Cases:
- Sending sensor data to the cloud
- Fetching online weather or time information
- Remote device control via a smartphone app or web dashboard
#Code:
#include <WiFi.h>
const char* ssid = "YOUR_SSID"; const char* password = "YOUR_PASSWORD";
void setup() { Serial.begin(115200);
WiFi.begin(ssid, password); Serial.print("Connecting to WiFi");
while (WiFi.status() != WL_CONNECTED) { delay(500); Serial.print("."); //...... }
Serial.println("\nConnected!"); Serial.print("IP Address: "); Serial.println(WiFi.localIP()); }
void loop() { // Nothing here for now }
#What is Access Point Mode?
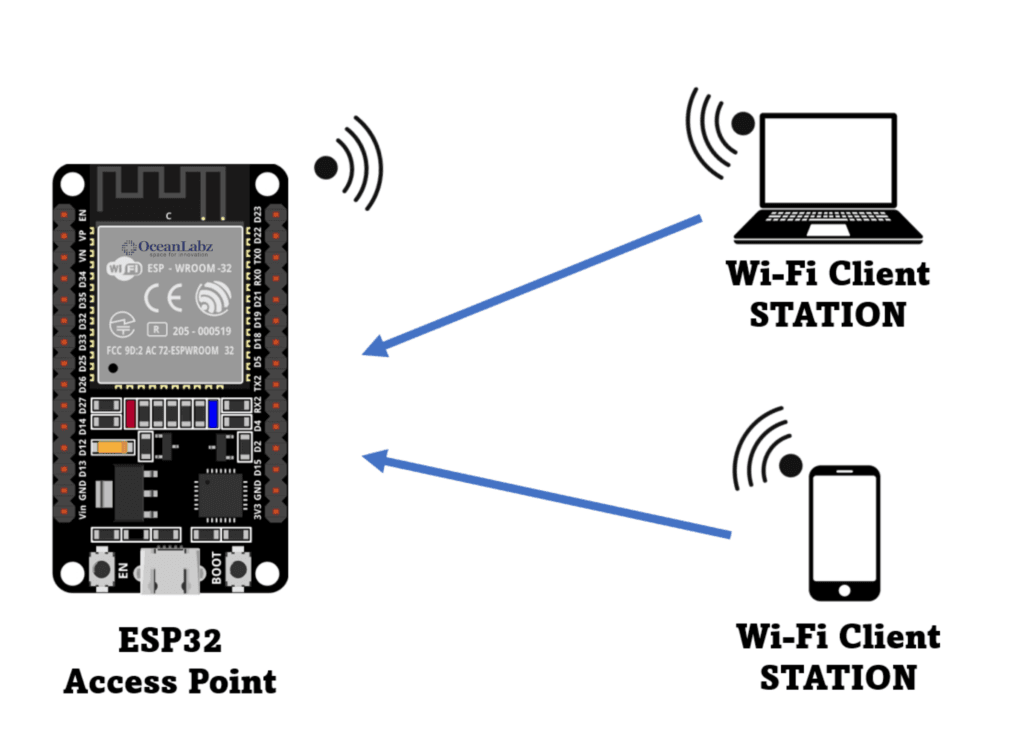
In Access Point Mode, the ESP32 creates its own Wi-Fi network (hotspot). Devices like phones or laptops can connect directly to the ESP32 without needing a router or internet access. This is useful for local control or configuration when no internet is available.
#Example Use Cases:
- Offline control of smart devices
- Initial setup/configuration pages
- Peer-to-peer data exchange without the internet
#Example Code:
#include <WiFi.h>
const char* AP_SSID = "ESP32_Hotspot"; const char* AP_PASSWORD = "12345678";
void setup() { Serial.begin(115200);
WiFi.softAP(AP_SSID, AP_PASSWORD); Serial.println("Access Point started"); Serial.print("IP address: "); Serial.println(WiFi.softAPIP()); //192.168.4.1 }
void loop() { // Nothing here yet }
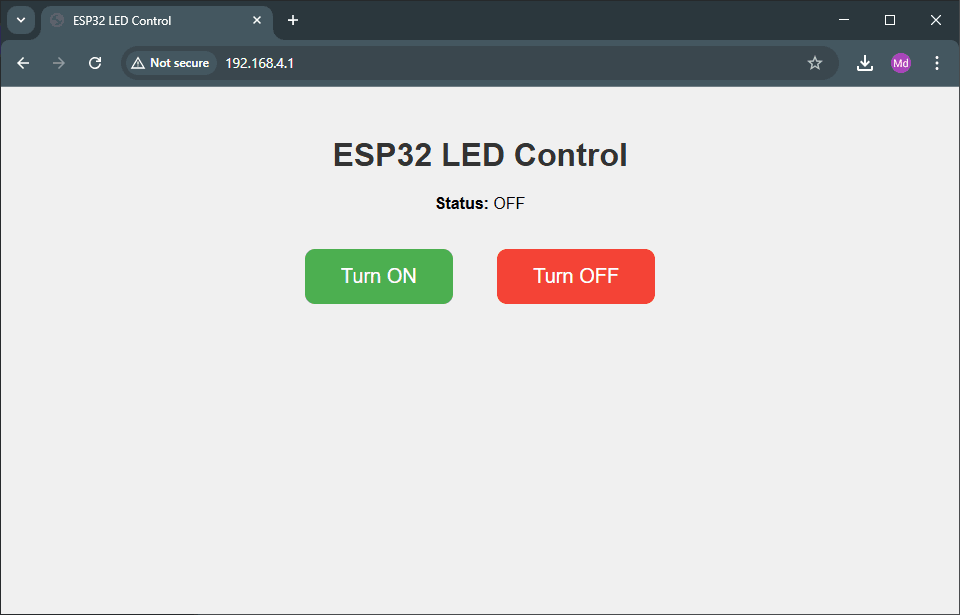
#ESP32 Access Point Mode: Create a Wi-Fi Hotspot to Control an LED
The ESP32 isn't just capable of connecting to Wi-Fi networks—it can also create its own Wi-Fi network using Access Point (AP) Mode. This allows users to connect to the ESP32 directly without a router and control devices like LEDs via a local web interface.
In this guide, we'll set up the ESP32 as an Access Point and host a web page that lets you turn an LED on or off from your browser.
Once set up, your ESP32 will:
- Create a Wi-Fi hotspot called "ESP32_Hotspot"
- Serve a simple web page with ON and OFF buttons
- Control an LED connected to GPIO 2 (you can change this pin if needed)
#Code
#include <WiFi.h> #include <WebServer.h>
// Access Point credentials const char* ssid = "ESP32_Hotspot"; const char* password = "12345678";
// Create web server on port 80 WebServer server(80);
// Define LED pin (GPIO 2 for onboard LED) const int ledPin = 2; bool ledState = LOW;
// HTML content to be served const char* htmlPage = R"rawliteral(
ESP32 LED Control
Status: %STATE%
)rawliteral";void handleRoot() { String html = htmlPage; html.replace("%STATE%", ledState ? "ON" : "OFF"); server.send(200, "text/html", html); }
void handleLedOn() { digitalWrite(ledPin, HIGH); ledState = true; handleRoot(); }
void handleLedOff() { digitalWrite(ledPin, LOW); ledState = false; handleRoot(); }
void setup() { Serial.begin(115200); pinMode(ledPin, OUTPUT); digitalWrite(ledPin, ledState);
// Start Access Point WiFi.softAP(ssid, password); Serial.println("Access Point Started"); Serial.print("IP address: "); Serial.println(WiFi.softAPIP());
// Define routes server.on("/", handleRoot); server.on("/led/on", handleLedOn); server.on("/led/off", handleLedOff); server.begin(); }
void loop() { server.handleClient(); }
#How to Use It
- Upload the code to your ESP32.
- Open the Serial Monitor at 115200 baud to view the IP address.
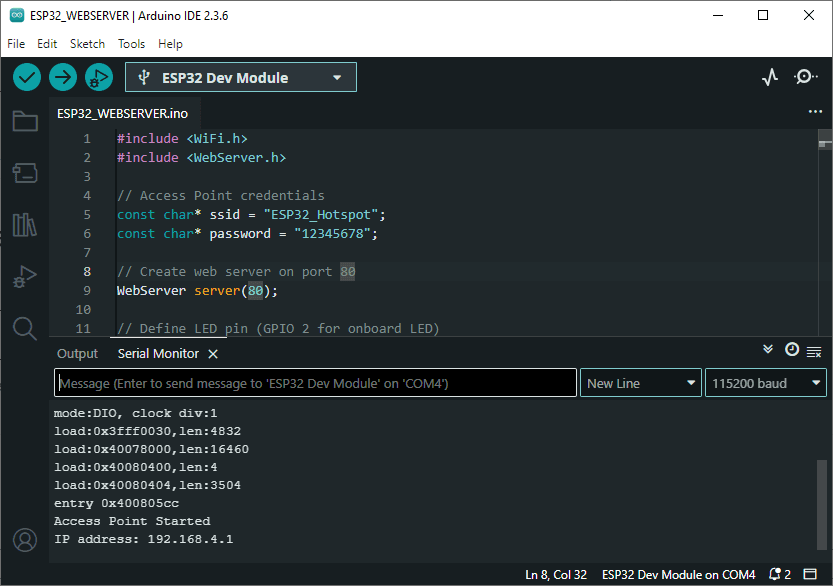
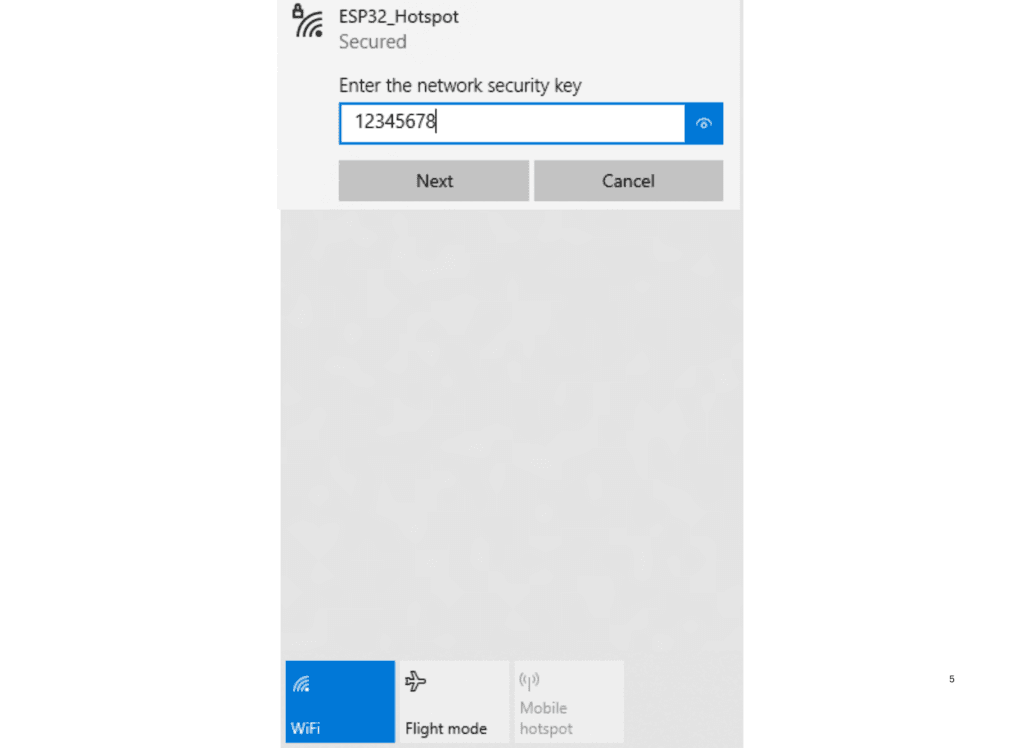
Connect your phone or laptop to the Wi-Fi named ESP32_Hotspot using password 12345678.
- Open a browser and enter the IP address from Serial Monitor (e.g.,
192.168.4.1). - Use the buttons to turn the LED ON or OFF!